Getting started · Lesson 1 of 10
Set up Timby in a minute
The first time you open Timby, a short setup gets your budget ready. There's no account to make.
- Open Timby. Read the three intro screens, or tap Skip intro.
- Choose your country and currency. Prices and totals will use it.
- Enter your monthly income. A rough number is fine. It helps suggest a budget and never leaves your phone.
- Pick a monthly budget: Tight, Comfortable or Generous, or enter your own amount.
- Pick your categories. You can rename them or add more later.
- Tap the subscriptions you pay for. Timby adds them to your bills, with prices you can edit.
- Turn on reminders if you'd like a nudge before bills are due.
- Choose a look and an accent colour, then tap Get started.
Want to start over? Go to Settings → Run setup again. Your entries, budgets and goals stay as they are.
Getting started · Lesson 2 of 10
Log your first expense
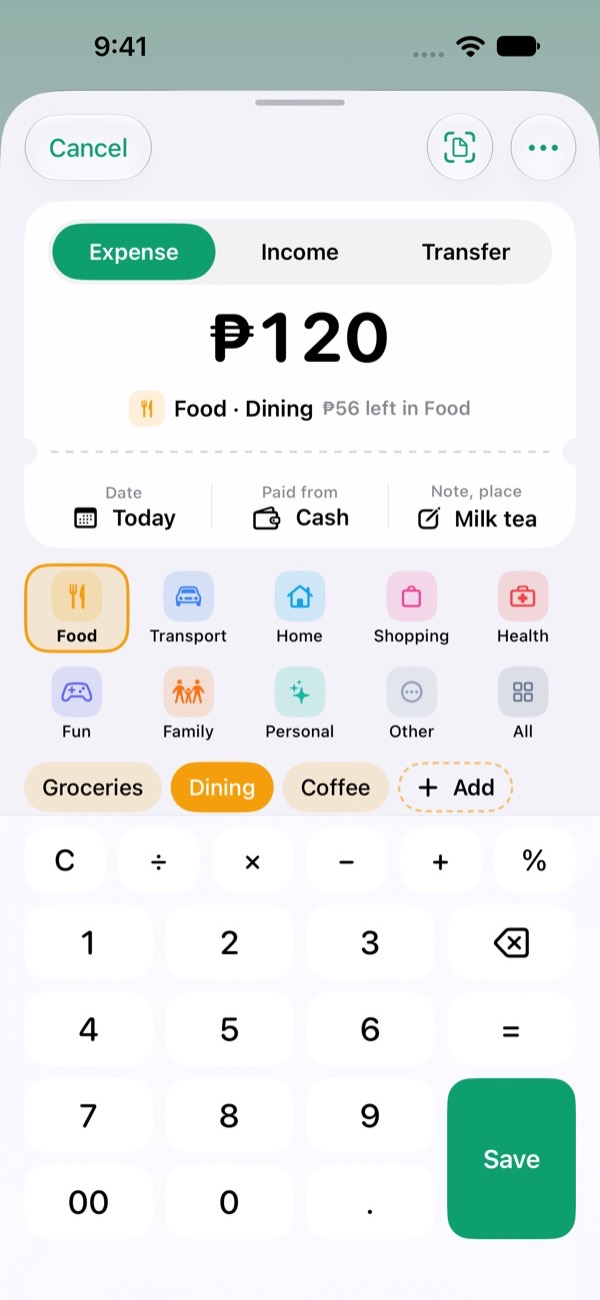
Adding an expense takes a few seconds. Do it right after you pay and your numbers stay true.
- Tap the round green + at the bottom right, then Add by hand.
- Type the amount. The keypad works like a calculator, so you can add a few prices together.
- Tap the category to change it. Under the amount you'll see what's left in that category, and how much that is per day.
- See a Usually button? Tap it to fill in what you usually spend in that category.
- If you like, tap Subcategory, or Add shop or note. You can also change the date.
- Tap Ready to save.
Got paid? Switch to Income at the top of the Add screen to log money coming in.
Getting started · Lesson 3 of 10
Scan a receipt
Got a paper receipt? Let Timby read it for you. It all happens on your phone, even offline.
- Tap the round green +, then Scan a receipt. Already took a photo? Tap Choose a photo instead.
- Hold the receipt flat in good light, fill the frame, and tap the shutter button.
- Wait a moment while Timby reads it.
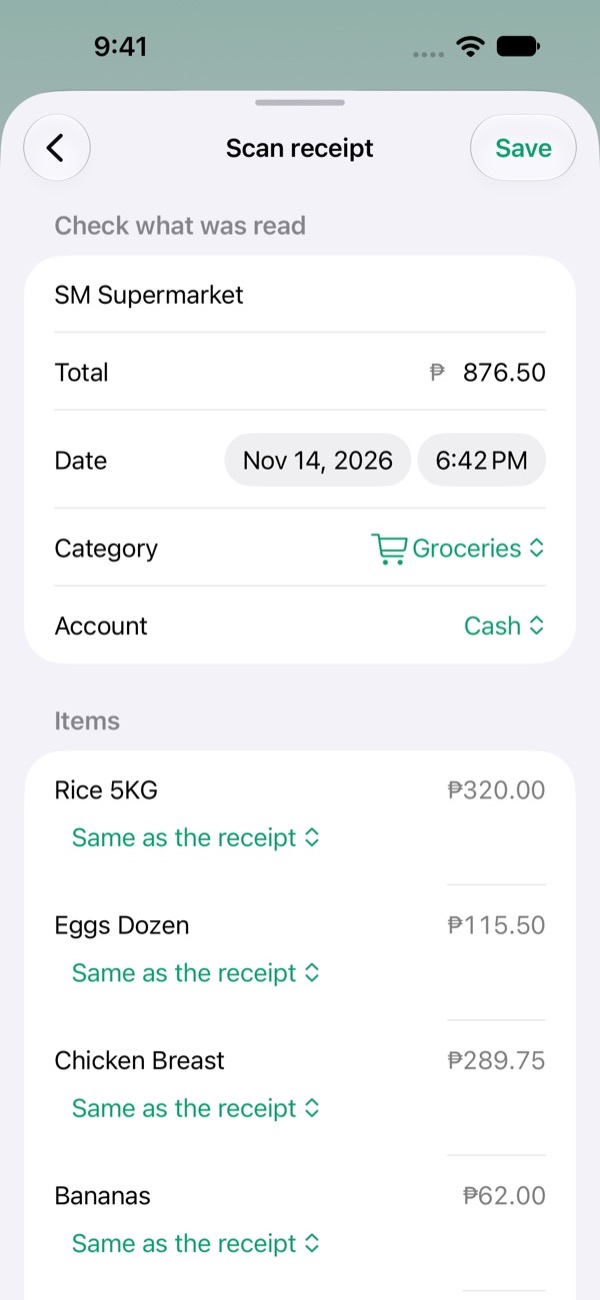
- On Check details, look over the shop name, total, date and category. Fix anything that's off.
- Tap Save expense.
No receipt handy? The Scan screen has a sample receipt you can try. If a photo can't be read, try again in better light or enter it by hand.
Getting started · Lesson 4 of 10
Read your Home screen
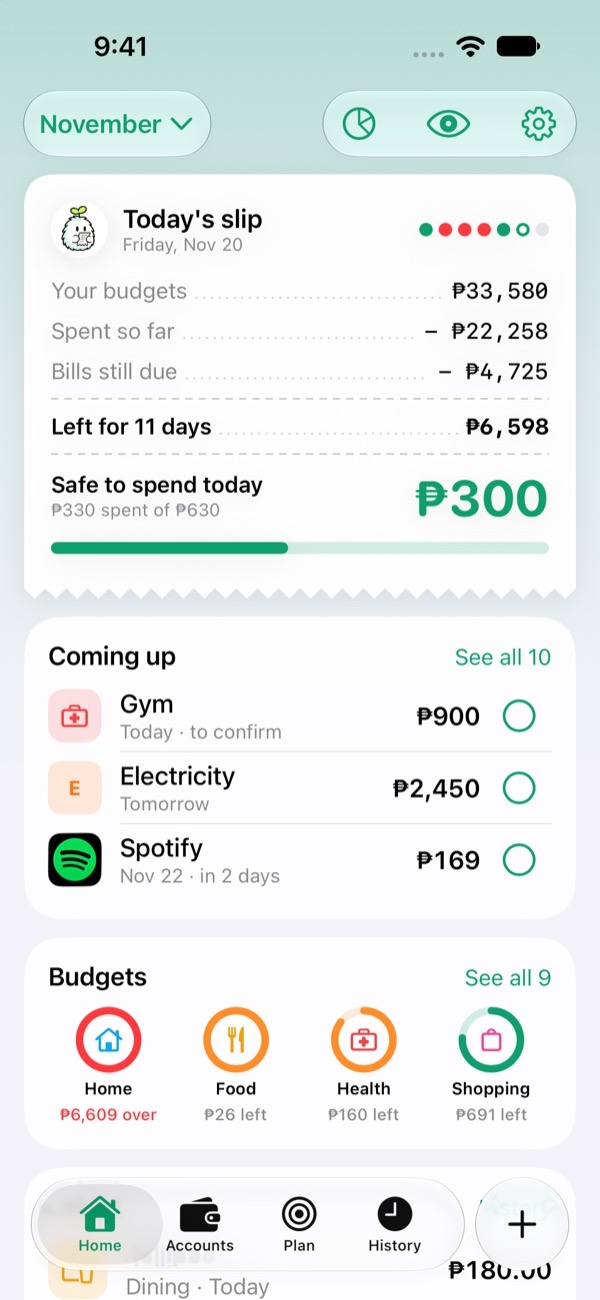
Home answers one question: how am I doing this month? Here's what each part means.
- At the top, Timby says hello with today's date. Tap Add your name to be greeted by name.
- Quick actions take you straight to Scan, Budgets, Goals, Bills, Debts and History.
- Under This month, the rings show Spent (of your budget), Saved (toward your goals) and Bills (due so far). Use the arrows to look at past months.
- Safe to spend today is how much you can spend today and still stay on budget. How it works.
- Money in and Money out show your income and spending for the month.
- Payments due lists bills due in the next 30 days, with the total.
- Spending by category shows where your money went. Tap a category to open its page.
- Recent shows your latest entries. Tap View all to open History.
The round green button at the top right of Home opens Settings.
The first month · Lesson 5 of 10
Set your budgets
A budget per category tells Timby what "on track" means for you. Start with a suggestion and adjust.
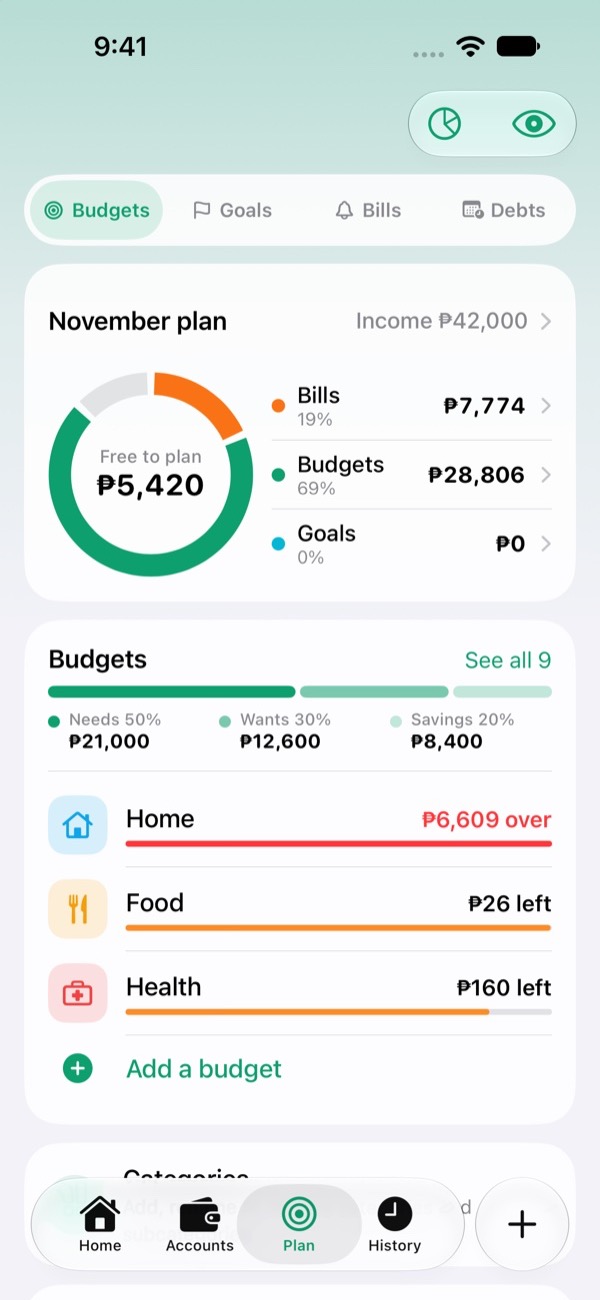
- Tap Plan in the tab bar, then Budgets.
- Look at the Suggested budgets card. It splits your income: 50% needs, 30% wants, 20% savings.
- Tap the card to see the amounts, then tap Use these budgets if they look right.
- To change one category, tap it and set a new monthly limit.
- Need another category? Tap the + at the top right of Plan.
Paid on the 15th? Set Settings → Month starts on to your payday, so budgets reset when your money arrives.
The first month · Lesson 6 of 10
Add bills and subscriptions
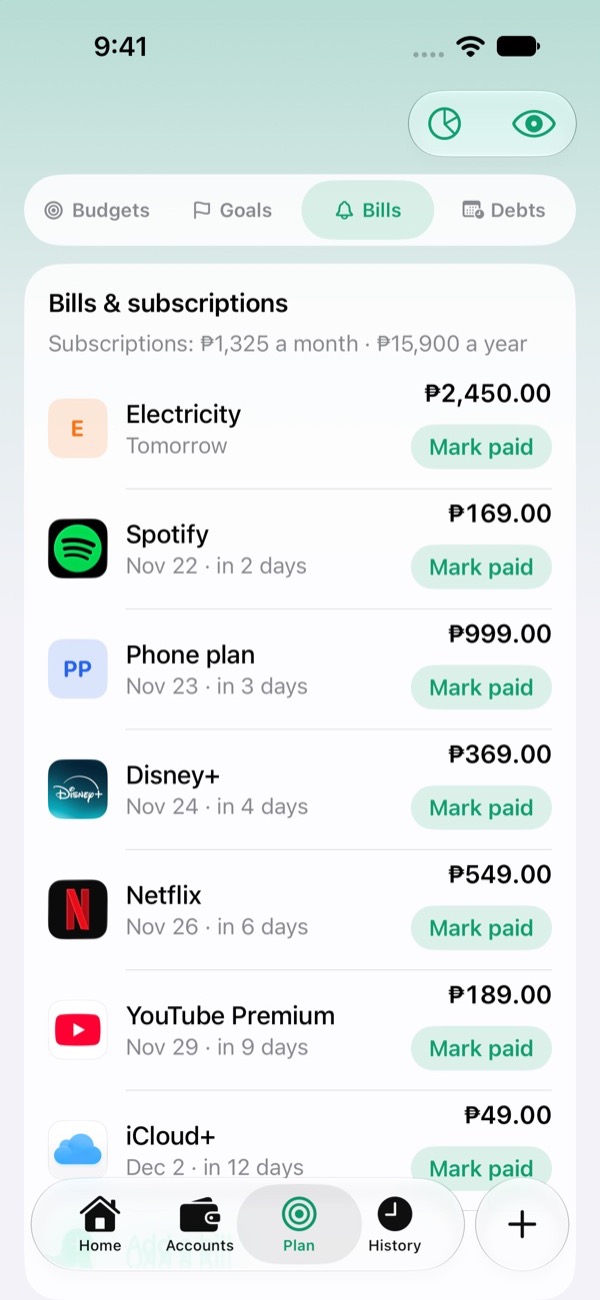
Put your regular bills in once, and Timby reminds you the day before each one is due.
- Tap Plan, then Bills.
- Tap the + at the top right.
- Enter the name and amount, how often it repeats (weekly, monthly or yearly) and when it's next due.
- For streaming, apps or memberships, turn on Subscription.
- Keep Remind me on, then tap Add bill.
Reminders arrive at 9 AM the day before. If they don't, check that notifications are allowed for Timby and that Bill reminders is on in Settings.
The first month · Lesson 7 of 10
Find, fix or delete an entry
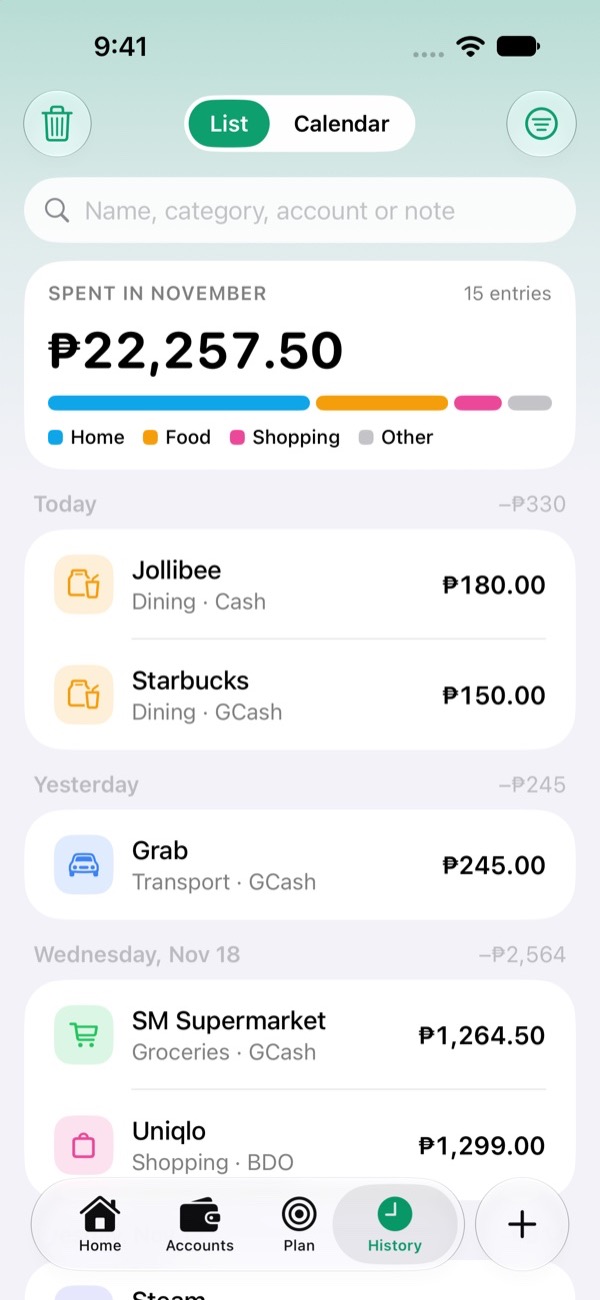
Typed the wrong amount? Every entry lives in History, and you can change it anytime.
- Tap History in the tab bar.
- Use the search box to find an entry by name, place or note.
- Tap Filters to show only expenses or income, or one category.
- Tap an entry to open it. Change the amount, title, category, date or note, then tap Save.
- To delete it, tap Delete entry, or swipe the entry left in the list. You can tap Undo right after.
Going further · Lesson 8 of 10
Save toward a goal
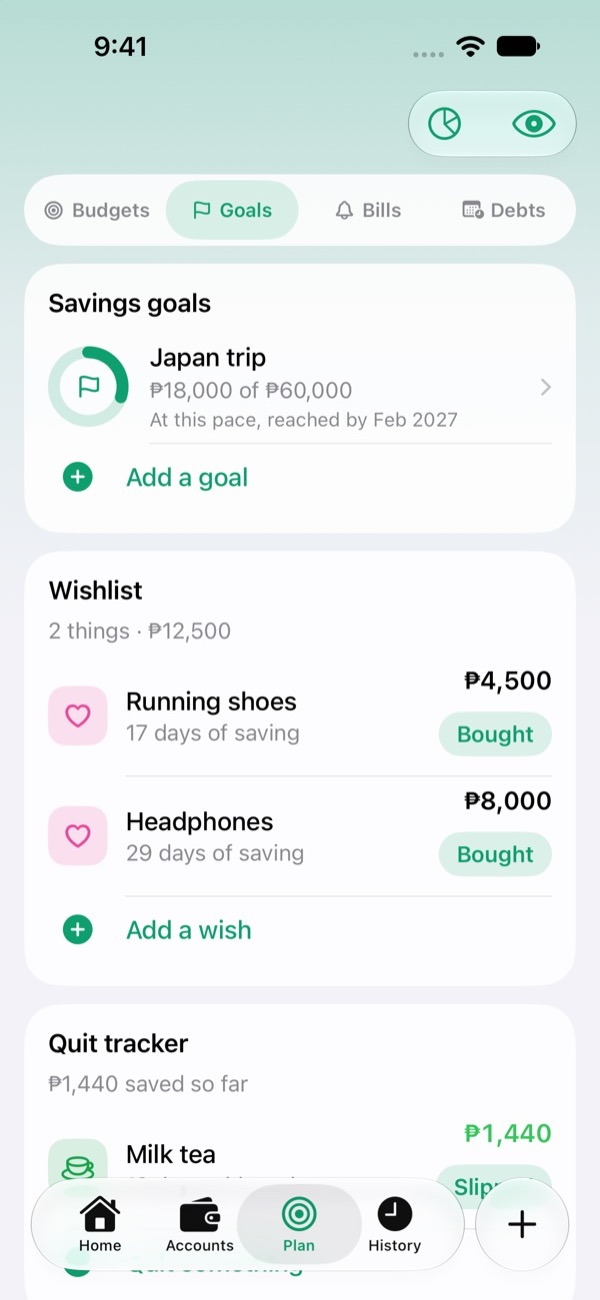
Saving is easier with a target. Timby shows how much to put aside each month to get there on time.
- Tap Plan, then Goals.
- Tap the + at the top right. Your first time, you can also pick a quick start like Emergency fund, Vacation or New phone.
- Enter the target amount. Add what you've already saved and a target date if you have one. Tap Add goal.
- Each time you put money aside, tap the goal and add it.
- With a target date, the goal shows how much a month reaches it by then.
Paying something off? The Debts tab in Plan tracks what you owe, the monthly payment and the next due date.
Going further · Lesson 9 of 10
Use Insights and category pages
After a few weeks of entries, the charts start to tell you something. Here's where to look.
- Tap Insights. The trend chart shows each month's spending. The dashed line is your average.
- Where it went splits the month by category in a donut.
- Scroll for By weekday, Top places and short facts about your month.
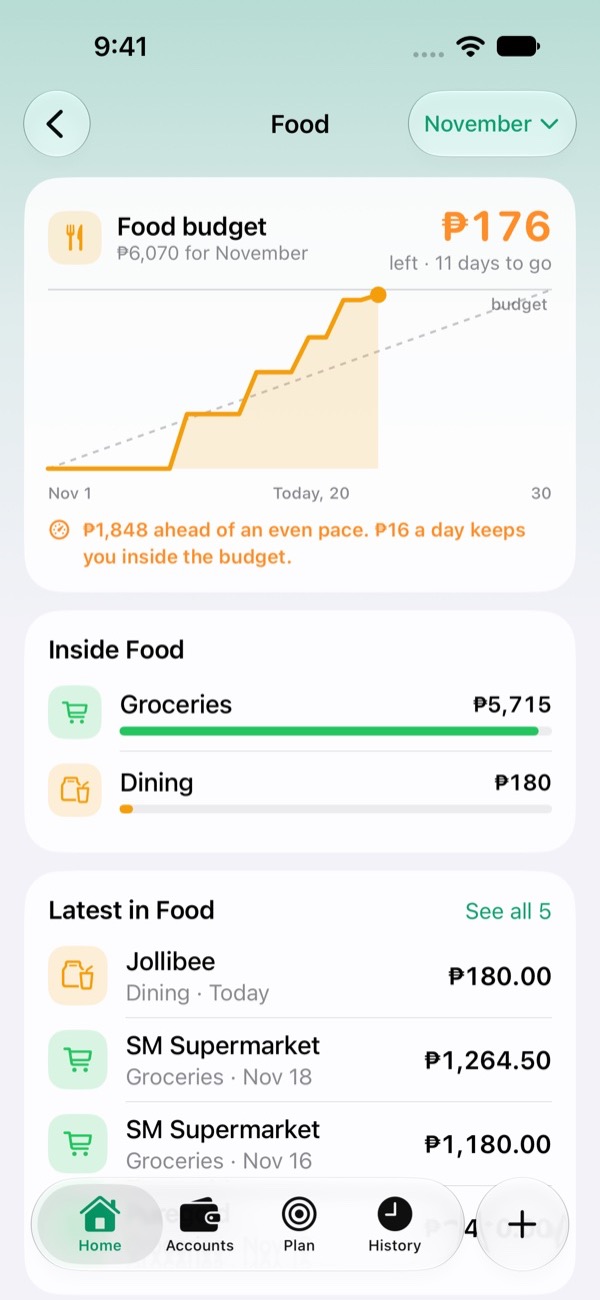
- For one category, tap it under Spending by category on Home. Its page shows a spending curve and its budget.
- Use subcategories? Tap the Subcategories card to see them as Pie, Flow or Tiles.
Going further · Lesson 10 of 10
Lock, back up and make it yours
Your data lives only on your phone, so a lock and a backup now and then keep it safe.
- On Home, tap the You button at the top left to open Settings.
- Turn on Lock with Face ID (fingerprint on Android).
- Tap Back up and export, then Back up everything. Save the file somewhere safe, like Files, Google Drive or an email to yourself.
- Want a spreadsheet? Tap Export spending for a CSV that opens in Excel or Google Sheets.
- New phone? Install Timby, then use Restore from a backup and pick your file.
- Change the theme, accent colour, currency or month start day any time.
Backup, export and restore are always free, even without Timby Plus.